Use Gmail Filters to Automate your Inbox
One of the most powerful tools Gmail provides is its filtering system. Strangely, it seems that few users of Google's extremely popular mail service take advantage of filters to improve their email experience and that's such a shame. Filters can help automate many of the tasks you may perform daily, and can streamline your inbox to show just the emails you want, while removing those you don't. It's true that Google does provide some email filtering already through features like inbox categories and tabs, automatic highlighting of 'important' emails, and, of course, spam filtering. But creating your own filters can take inbox organization to the next level, and help you spend less time in your inbox each day. The Basics of FilteringFiltering is accessed in Gmail under the 'Filters and Blocked Addresses' tab of the settings screen. You will need to open the Gmail web client on a desktop to access this setting, as there is currently no way to set up filters from the mobile Gmail app. In this section of the settings screen you will find two sections, one for filtering emails, and another for blocking emails. In this article we'll be focusing on filtering emails, although it's easy to add email addresses to the blocked address list through the option under each email in a thread. The first step to setting up a filter is to create a set of search parameters. Any incoming emails that match these search terms will be acted upon before they reach your inbox, so it's important to make your terms as specific as necessary. Google provides several self-explanatory boxes to create the search terms you require, and you can combine as many of these fields into the one search as you'd like.
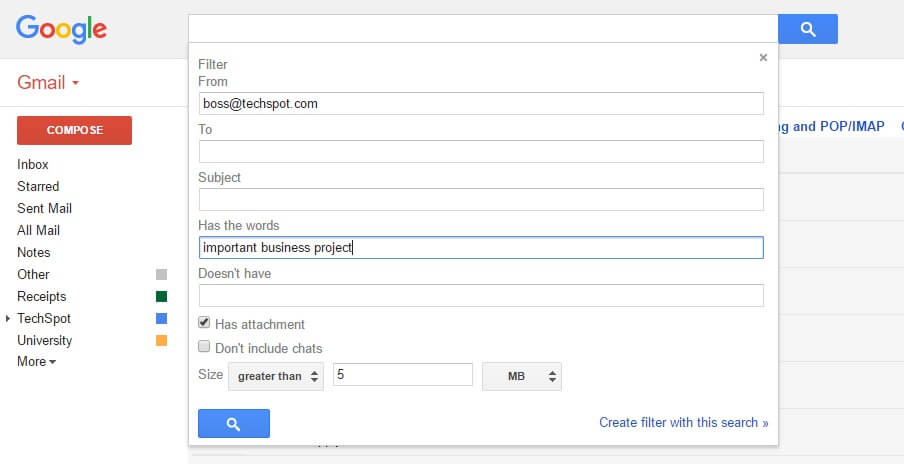
For example, let's say you want to filter all emails from your boss relating to your important business project that have large attachments. You can set up a search with the following terms:
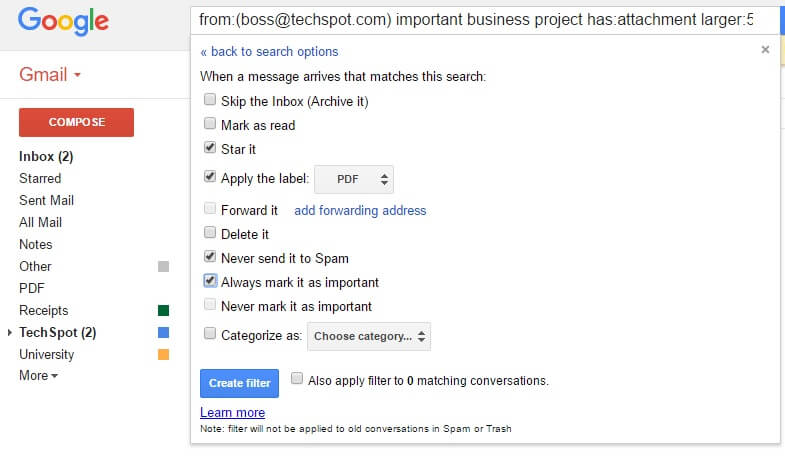
The next step is to set what you want the filter to do. There are a lot of very handy options available here, from automatically labelling emails, to outright deleting them when they arrive. As with the previous step, you can combine multiple actions into the one filter.
Using the previous example, let's say you want to label these emails as 'PDF' and make sure they are as prominent in your inbox as possible. Setting up the following filter actions would be wise:
Click to create the filter (you can also apply the filter to existing emails) and it'll quietly work in the background to optimize your email experience. Handy Uses for FilteringNow that you are aware of the filtering system and how it works, here are some handy things you can use the system for. Several of these have helped us automate our inboxes by cutting down on unwanted emails and categorizing incoming mail so it can be easily tackled.
Of course, there are a bunch of other things you can do with Gmail's email filtering system, so if you want to streamline your inbox and automate some basic tasks, it's well worth exploring its full capabilities. 5 days, 5 killer tech tips is a new TechSpot monthly featureOn the 3rd week of every month, we will publish 5 tech tips, one for each day of the week (Monday-Friday) about a given app, service, or platform. This week it's about uncovering great Gmail usability tips and tricks.
|